
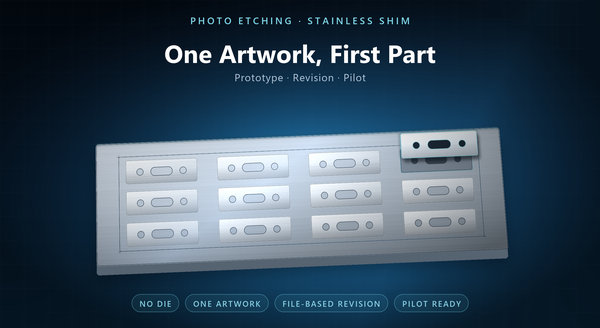
stainless steel shim prototype etching
Stainless steel shim photo etching is where most shim programs begin: a part that has never been made, a quantity too small to justify a die, and a drawing that may still change. Etching suits that stage because the pattern lives in an artwork rather than in a tool. Nothing is cut in metal, no program is written, and no die is amortised into the piece price. The same file that produces the first article can produce the pilot lot and, if the volume never justifies stamping, the production part. This page follows that arc — first part, revisions, small batches and the handoff — rather than the chemistry, which the process page owns.
1. Where a Shim Program Gets Stuck
A new shim usually stalls at the same point. The design is not frozen, the quantity is a handful, and the default route — a stamping die — needs both a frozen drawing and a tool that has to be cut, tried and corrected before it makes a good part. Every revision after that is a tool change, and the tool is paid for whether the part sells or not.
Photo etching removes that gate. The pattern is carried by an artwork, so the first part comes off the same operation that will produce the hundredth, and a change of shape is a change of file. There is no die to commit to, no press to set, and no trim or form sequence to plan.
The catch is that a prototype made this way is a real etched part, not a simulation of a stamped one. It proves fit, function and stack-up; it does not prove what a punched edge will do to a seal.
That is why a design review so often ends with an order for ten pieces: a die cannot be justified until those ten have been tested.
2. One Artwork, One First Part
For stainless steel shim photo etching, the input is a file: a closed outline, holes, slots, and any half-etched step, with the alloy, temper and thickness named. The etcher converts it into a phototool or a direct-imaging job, compensates the geometry for its own undercut, and steps the part across a panel with tie bars and registration marks.
The first article comes off that panel. It is not a machined mock-up or a hand-trimmed sample; it is the production geometry, made by the production route, at the production tolerance. That is the point of the exercise: the part you approve is the part the process makes.
Two details decide how well this works. The first is a clean CAD file with one outline layer and a stated datum, because ambiguous geometry becomes an ambiguous part. The second is a panel layout chosen for the pilot rather than for a single piece, because the layout is what later runs inherit.
Nothing is cut in metal here, so the tool is a file you can archive, compare and re-run. Naming the thickness on the drawing also tells the etcher how much undercut to compensate.
3. The Revision Cycle
A revision is an artwork edit. The contour moves, the file is re-imaged, a new panel is etched, and a new first article is measured against the revised drawing. No tool is recut and no program is rewritten, so the loop is set by imaging and etching rather than by toolmaking.
That changes how a team should revise. Batch the changes: five small edits made together cost one loop, while five separate edits cost five. Change one thing at a time when the cause is unclear, and record the artwork revision on the drawing and, if marking is used, on the part. Keep the superseded file.
Not every change is an artwork change. A different alloy, temper or thickness means different material and a fresh first article, even when the geometry is identical. Moving a tie bar or a registration mark is an artwork change, and it can shift how a part sits in the panel, so it deserves the same review as a contour edit. The loop is short enough for the designer to see the result before the next design review.
4. Designing a Prototype That Survives Scale-Up
Some decisions are cheap during the prototype and expensive afterwards.
Alloy and temper are set by the mill, not by the etch, so a temper chosen casually at prototype becomes a purchasing constraint at volume. Thickness should be a standard strip gauge for the same reason. Half-etch depth needs a datum, not just a number, or the second supplier will measure it from somewhere else. Tolerance callouts should say where they are measured, because an outline tolerance checked at the tie-bar cut is not the same as one checked on the finished edge.
Flatness is easy to promise at prototype and easy to lose in packing, so write the packing method down while the quantity is still small.
The test is simple: could a second etcher quote this drawing without a conversation? If not, the prototype is hiding a decision that production will have to make again. Avoid designing a feature whose only proof is a section through the part. Ten minutes spent writing the packing rule at prototype save a rework loop at volume.
5. Small Batches on a Shared Panel
Etching prices a run by the panel, not by the part, because the cost sits in artwork, imaging and setup rather than in the cut. A single shim and a short lot therefore land close together, and the quantity that matters is how many parts fit on the panel.
That opens a useful option at pilot stage. Parts of the same alloy and thickness can share one panel, so a three-shim kit can be etched as one job. The constraint is the tie bars. They have to hold each part through the machine and be cut or broken later, so their position belongs in the design review — never across a sealing land or a sliding face.
Panel utilisation also predicts the production price. If a part leaves a third of the sheet empty, the pilot is quietly quoting the inefficient layout that volume will inherit, and a nesting change later will look like a price change. A kit that must share a sheet should be designed to a single gauge.
6. What the First Article Must Prove
A first article is a measurement, not a sample. It should report the dimensions that carry a tolerance and state where each was taken, the material certificate and the strip lot, the thickness as received, flatness, the half-etch depth against its datum, the edge condition, any passivation or marking, and the packing method.
Two failures are common. The first is a report full of nominal values with no measurement uncertainty, which cannot separate a good part from a marginal one. The second is a coordinate report without the datum scheme it was built on, which cannot be compared with the drawing. Each line on the report should name its method and its instrument.
Keep the measured part as well as the paper. When revision three arrives and a feature has moved, the only proof of what changed is a comparison with the part that was approved, not a memory of it. Approval should name the drawing revision it applies to.
7. Handing Off to Production
The handoff is a freeze, and it should be written: the artwork revision, the alloy and temper, the thickness range, the finish, the packing, and which tolerances the process controls as opposed to which come from the strip.
Pilot lots are where capability is learned. A few etched panels drawn from more than one strip lot show whether a tolerance holds or whether it was luck, and a production order should be placed against that data rather than against a promise.
The route decision comes next. Photo etching stays the production process when the gauge is thin, the features are fine, the volumes are modest, the part family is wide, or revisions are still expected. Stamping takes over when a part is frozen and the annual quantity justifies a die. A handoff to a die does not carry the artwork compensation or the panel layout; it carries the geometry and the tolerances, and those have to be proven again. Keep a bridge quantity etched while the die is proven, so the line does not wait.
8. Order Notes for a Prototype Run
A prototype enquiry should carry the file, the alloy and temper, the thickness, the quantity per revision, the tolerances that matter, the finish, the packing and the date the part is needed. Say whether the artwork should be returned or held, and whether the drawing is expected to move during the run. List the quantity per revision separately so a revision can be priced on its own.
The quote should come back with the etch tolerance the supplier will hold, the panel size, the number of parts per panel, the lead time to first article, and whether a revision is priced separately. A quote that gives a piece price with no panel behind it cannot be compared with another.
Expect a first article from the production route, a revision you can trace by file, and a pilot lot that repeats. If the part is right but the report is thin, ask for the report: it is what makes the next revision cheap. Ask who holds the artwork, too: a file you can take elsewhere is leverage.