
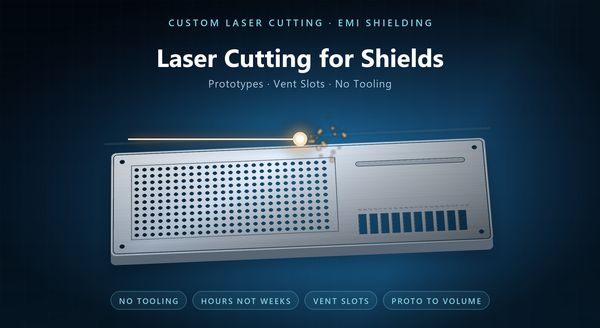
custom EMI shield prototype
Custom EMI shield laser cutting produces shield lids, covers, vent panels and brackets by tracing a profile from a file with a focused beam, with no die and no phototool. For a shield program it is the fast route: a new outline can be cut the day the drawing is agreed, and a revision is a new program rather than a new tool. It is also a route with a narrow comfort zone, because a beam brings heat and cannot make a dense field of fine apertures economically. This page covers where laser cutting earns its place on a shield, what it does well and badly, and the point at which the part should move to chemical etching or to a die.
1. Where Laser Cutting Fits in a Shield Program
Shield designs move. A vent array is resized after an EMC scan, a connector cut-out moves when the board is re-spun, and a lid grows a notch for a component that was added late. In that phase, tooling is a liability, and a process that needs only a file keeps the program moving.
Laser cutting covers that phase well. It also covers the low-volume and high-mix cases: a family of shields that differ in outline, a service part that will never repeat, or a bracket that is cut from the same sheet as the lid.
The process has a second place where it competes: thicker or simpler parts. As the material gets thicker, etching slows down and its cost rises, while laser cutting stays a single pass along the profile. A plain outline with a few large cut-outs is often cheaper to laser than to etch, whatever the volume.
2. What Laser Does Well on a Shield
Outlines are the core strength. A shield can, lid or fence is a developed shape with tabs, reliefs and mounting holes, and the beam follows that profile at a consistent kerf. There is no tool wear to compensate and no die to maintain.
Vent slots and large apertures are straightforward. A row of slots, a set of rectangular openings or a display window is a contour like any other, and the cut quality on a straight run is good.
Custom detail comes free in the same way it does with etching: a part number, an alignment feature or a keying notch costs nothing beyond the programming. Nesting is simple as well, because the outline is the only constraint; parts can be packed close and the remnant scrapped.
Speed matters too. Turnaround is measured in hours or days rather than in the weeks a die takes, and a revision can be cut, formed and trialled inside a single engineering cycle.
3. Where Laser Is the Wrong Tool
Fine aperture fields are the hard limit. A vent array of many small holes is a large number of separate contours, each with its own pierce and its own heat input. Cut time rises steeply, and the heat accumulates in a thin panel, so the part can distort while it is being cut.
Thin foil is the second limit. Below a certain gauge the sheet cannot hold itself flat against the beam’s assist gas, and the cut edge starts to lift and dither. Etching handles that gauge far more gracefully because there is no force and no gas.
Feature size relative to thickness is the third. A laser kerf has width, and a slot narrower than the kerf cannot be cut at all; a web between two cuts has to be wide enough to survive the heat. As thickness rises, the minimum feature rises with it, and the geometry that was easy at one gauge becomes impossible at another.
Finally, laser cutting is a through-cut process. It cannot produce a half-etched recess, a stiffening rib or a bend relief, so a design that relies on those features needs etching or a second operation.
4. Heat, Edge and Contact
Every laser cut leaves a heat-affected zone. On a shield that matters in three places: the cut edge, which carries an oxide that is darker than the parent metal; the recast layer, a thin resolidified skin that can be brittle; and the surrounding metal, which may soften if the alloy was work-hardened.
For most shield parts those effects are tolerable, provided they are handled. Oxide on a stainless edge should be removed before the part goes into an assembly where contact resistance or corrosion matters, which usually means a cleaning step and passivation rather than a mechanical polish.
Where the part is plated, plating after cutting covers the edge and removes most of the concern. Where the edge itself is the contact surface — a finger that lands on a pad, for instance — the cut quality and the cleaning sequence belong on the drawing rather than in the shop’s discretion.
The one effect that cannot be cleaned away is distortion. A thin panel that has been cut with too much heat will not be flat, and no finishing step will bring it back.
5. Design Rules for Laser-Cut Shields
Give every internal corner a radius. A sharp corner forces the beam to decelerate, which concentrates heat and leaves a notch that also concentrates stress in a thin shield.
Keep slots and webs proportionate to thickness. A slot narrower than the kerf is impossible, and a web thinner than the sheet is likely to distort; both should be sized from the gauge, not from the drawing’s convenience.
Compensate the kerf in the program, and say which dimensions are critical. The beam removes a path of finite width, so an outline drawn to nominal will come out undersized unless the program offsets it, and a drawing that carries pre-offset geometry removes the supplier’s ability to correct it.
Avoid dimensioning the heat-affected zone. It is a process artefact, not a feature, and specifying its width invites an argument that no measurement will settle.
Place tabs and handling features deliberately. A laser-cut part still has to survive forming and shipment, and a thin shield with a large cut-out needs its stiffness somewhere.
6. Forming After Cutting
Most laser-cut shields are formed after cutting, and the two operations have to agree on the bend line. A laser can mark a bend line or cut a series of relief slits, but it cannot produce the half-etched crease that makes a fold predictable, so the forming route has to be chosen at design time.
Finger arrays are the common formed feature. Cut as a comb and then bent, each finger becomes a cantilever whose contact force comes from its width, length, thickness and formed angle. Cutting leaves a clean edge, which helps the contact, but the bend itself introduces stress, so the sequence matters for a spring alloy.
Plating goes after forming, as it does for etched parts, and for the same reason: a formed film can crack at the bend.
7. Cost and Lead Time
Laser cutting has no tooling, so the entry cost is engineering time. The running cost is machine time, which scales with the length of the cut, the number of pierces and the thickness, and with the consumables that keep the lens and the nozzle in condition.
That cost curve explains the fit. For a few parts, or for a part that is mostly outline, laser is the cheapest route. For a dense aperture field, etching wins because it removes all the metal at once instead of tracing every contour. For high volume with a frozen design, a die wins on unit cost. Consumables are easy to leave out of that comparison: nozzles, lenses and assist gas are real money per hour, and they behave differently on thin sheet than on thick.
Lead time follows the same logic: laser is fast at the start of a program and stays fast through revisions; a die is slow at the start and cheap only afterwards.
8. Inspection, Order Notes, and Choosing the Route
Inspection of a laser-cut shield covers the outline, the aperture positions, flatness, edge condition and the state of any formed feature. Flatness deserves attention because it is the property most easily lost to heat, and a lid that bows will not seat on its fence.
An order should state material and thickness, the profile with kerf compensation agreed, the critical dimensions, the flatness limit, the edge and cleaning requirement, the forming callout, the finish and the packing.
Choosing between laser and etching is usually decided by three questions. How fine is the smallest feature relative to thickness? How much of the part is aperture rather than outline? And how likely is the design to change again?
| Laser cutting | Chemical etching | |
|---|---|---|
| Tooling | program only | artwork only |
| Heat | heat-affected zone, oxide | none |
| Fine apertures | slow, heat accumulates | the natural strength |
| Half-etch | not possible | possible |
| Thick material | one pass, efficient | slow, expensive |
| Design change | new program | new artwork |
A shield that is mostly outline and still moving belongs in laser. A shield that is mostly aperture, or needs a recess or a crease, belongs in etching. Many programs use both, in that order, and the handover point is worth writing down.