
photo etching
Photochemical machining, also known as photo etching or chemical etching, is a subtractive manufacturing technology that creates precise patterns on thin metal sheets. It combines photoresist imaging and selective chemical corrosion to produce complex, burr-free micro-components without mechanical cutting force. Unlike laser cutting or stamping, this process does not deform the thin metal substrate, making it ideal for mesh, encoder discs, shims and micro precision parts.
Core Principle
The whole process relies on photoresist material and etchant solution. A protective photoresist film is applied to the metal surface. After exposure and development, the area that needs to be removed is exposed. The etchant eats away the unprotected metal selectively, while the regions covered by cured photoresist remain intact. In this way, the exact pattern from your CAD drawing is transferred onto the metal sheet.
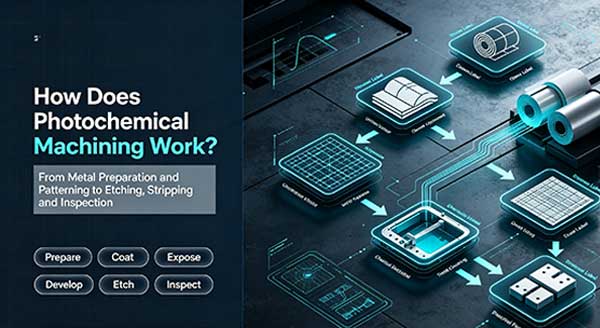
Step-by-Step Working Process
- Metal Sheet Preparation Clean the raw thin metal material thoroughly to remove oil, oxide and contaminants. A clean surface ensures photoresist can bond firmly. Common materials include stainless steel, copper, brass, nickel and alloy.
- Photoresist Lamination Apply a light-sensitive photoresist layer to both sides of the cleaned metal sheet. The photoresist will harden when exposed to UV light.
- Tooling & UV Exposure Print your part design onto transparent phototool films. Place the film over the photoresist-coated metal, then expose under UV light. The areas under the opaque part of the film stay soft; the exposed areas become polymerized and resistant to developer.
- Development Wash away the unexposed, soft photoresist with developer solution. Now the metal surface shows the bare areas to be etched, protected by hardened photoresist everywhere else.
- Chemical Etching Immerse the sheet into spraying etchant tanks. The corrosive chemical dissolves the uncovered metal from top and bottom simultaneously. Etch depth is controlled by time, temperature and solution concentration. This is the key forming stage.
- Stripping Remove the remaining hardened photoresist using stripping solution after the target depth is achieved. The designed metal part pattern is now fully revealed.
- Inspection & Post-processing Carry out dimensional inspection, flatness check and visual quality control. Optional post treatments include passivation, polishing, deburring, laser marking or cutting into individual parts.
Key Advantages of Photochemical Machining
- No mechanical contact, zero burr and no material deformation on ultra-thin metals
- Supports highly complex geometries, micro holes and fine slits
- Low-cost tooling, fast prototyping and short lead time
- Consistent tolerance across the whole batch
- Works for thin sheets from 0.02mm up to 2mm
Common Applications
Photochemical machining is widely used for encoder discs, microporous filter mesh, metal shims, bipolar plates, lead frames, EMI shielding foils, sensor components and precision metal grids.
Conclusion
Photochemical machining transfers digital drawings into physical metal parts through photolithography and controlled chemical corrosion. It is a flexible precision manufacturing method, especially suitable for thin metal micro parts that stamping or laser cutting struggle to produce without distortion or burrs.