
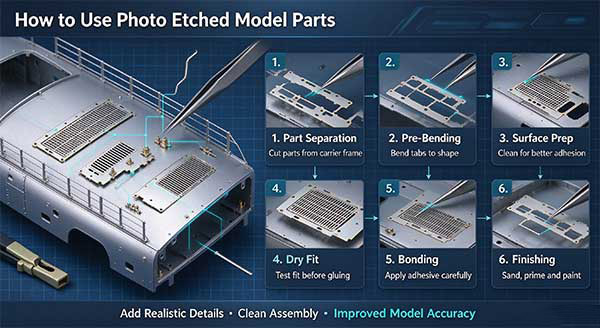
photoetched parts assembly
Photo etched (PE) model parts are thin metal detail accessories for scale models. They feature ultra-fine details but are fragile, so proper handling and assembly skills are required. This guide explains how to use photo etched model parts step by step.
- Prepare necessary tools Basic tools include side cutters or photoetch scissors, bending jigs, tweezers, fine sandpaper, metal glue or CA super glue, masking tape, paint and cleaning fluid. Sharp and precise tools help avoid deforming delicate PE parts.
- Cut parts from the carrier frame Use sharp cutters to snip the small connecting tabs between PE parts and the main frame. Do not bend or pull the part directly by hand, which may crack thin metal details. Leave a tiny tab at first, then sand it smooth after separation.
- Clean the parts thoroughly PE parts have residual oil and anti-tarnish coating. Wipe or soak parts in cleaning liquid to remove grease. Poor cleaning will lead to weak glue bonding and paint peeling later. Dry completely before assembly.
- Bend parts with bending jig Many photo etched components need folding to form 3D shapes, such as railings, ladders and brackets. Place the part inside a bending jig and fold slowly and evenly. Avoid over-bending or repeated folding, as metal may crack. Small simple bends can be finished with tweezers carefully.
- Dry fit before gluing Test fit the PE part on your scale model without glue. Adjust angles and positions to make sure it sits flush. Dry fitting helps you find interference problems in advance and reduces rework.
- Apply adhesive and install Use CA glue (cyanoacrylate glue) or dedicated metal adhesive. Apply only a tiny amount of glue at the contact point. Too much glue will overflow and cover fine details. Hold the part steadily with tweezers until the glue cures fully.
- Surface treatment and painting After glue cures, sand tiny seams if needed. Primer is strongly recommended for metal PE parts to improve paint adhesion. Apply paint in thin layers. For weathering effects, use washes and pigments to simulate rust, dirt or wear.
- Final inspection Check loose joints, bent details and paint defects. Touch up small flaws to finish your upgraded scale model.
Tips for using photo etched model parts
- Never apply excessive force; thin PE metal is easy to deform.
- Do not touch bonding areas with bare fingers, skin oil affects adhesion.
- Pre-fit first, glue second.
- Store unused PE sheets flat to prevent warping.
Photo etched parts are widely used for ship, aircraft, tank, military vehicle and architectural scale models, bringing amazing realistic details to your model projects.